🚗 Light Up Your Drive with Style!
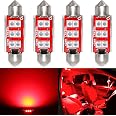
The PHINLION 194 LED Light Bulb is a pack of two super bright, pure red bulbs designed for various automotive lighting needs. With a power consumption of just 1.8W per bulb and an impressive brightness of 600 lumens, these bulbs feature six high-output 3030 LED chips for maximum illumination. They are easy to install with a Canbus error-free design, making them compatible with 99% of vehicles. The aluminum body ensures excellent heat dissipation, enhancing durability and lifespan. Ideal for dome, map, and license plate lights, these bulbs are a stylish upgrade for any car enthusiast.


| Brand | PHINLION |
| Specific Uses For Product | Door Light, Interior Light, License Plate Light |
| Item Package Quantity | 1 |
| Color | Red |
| Fit Type | Vehicle Specific Fit |
| Auto Part Position | Rear |
| Manufacturer | Phinlion |
| Item Weight | 0.634 ounces |
| Product Dimensions | 0.98 x 0.46 x 0.46 inches |
| Item model number | Phinlion-T10-3030-6SMD-R |
| Manufacturer Part Number | Phinlion-T10-3030-6SMD-R |
| Voltage | 12 Volts |
P**S
Amazing!!!
Awesome productSuper bright and great price!!!
R**A
OMG Let There Be Light
These are so bright, exactly what I was looking for. I wanted red lights that would be bright enough so I can still read of find something of I dropped it. I have purchased other lights that weren't bright enough. I am so glad I gave these a try. If you want Mood Lighting try other brands, but if you want bright lighting try these, you won't be disappointed. Downside they only last about 5 Months.
J**N
Nice look
Nice
T**G
Very bright
These are nice, high quality, snug fit but these are very bright. It's a little intense but it doesn't look bad at all
T**N
Easy to install
Glows a nice blue color. Fits as designed, worth the money
G**S
Fits very loosely, trouble staying in place
Replaced the bulbs a 2007 4Runner's marker lights / parking lights / daytime running lights with these bulbs. On the 4Runner, these are very difficult to reach, so it's critical that the bulbs remain firmly in place.When installed in the sockets, these bulbs are very loose - loose enough that if you shake the socket vigorously, the bulbs fall right out. Not a good sign of how likely they are to remain in place under normal driving conditions, much less any sort of off-road driving... so I used electrical tape to secure the base of the bulb to the socket.After one day of driving (not offroad, just on rough country roads), one of the bulbs had stopped working. Removed the socket, and sure enough, the bulb had jiggled loose and fallen into the headlight assembly. Had to remove the entire headlight assembly to shake the bulb out, in order to replace it with the original dim bulb.
G**S
Easy install worked great
They worked fine in my new headlights and turn lights along with my new grill
A**A
WOW! Huge upgrade over stock incandescent Map lighting!
Easy to install, 10X brighter than OEM bulbs. These do require a lil bit of technique to install, and NO you do not need to do any cutting or modifying of the map light trim to get these to fit...1) Using a small flat blade screw driver, carefully remove the round map light lenses. BE careful not to let the tool slip and scratch your trim/lenses. Be mindful of the lens mounting prongs, they can be broken if you use too much force or hurry this step. IF You break a prong, The lenses will not stay installed and must be replaced.2) grab either side of the map light trim panel and pull straight down do release the clip on either side allowing the map light panel to drop down giving access to the wiring. (This does require a lil strength, but if you do it slowly, the clips won't break, just pull STRAIGHT down and don't twist the panel when pulling)3) Grab the bulb socket clip and pull straight out of the mounting hole, the Original bulb may/may not become dislodged from the socket. If they don't just pull them out of the socket. The OEM bulbs will be really hot if they been on, so be careful. You can burn your finger removing the bulbs if they're hot.4) the new led bulbs will be wider than originals, and cannot be put back in from behind. Push the led bulb up from the bottom side and attach the sockets, then push them back into the mounting holes. BE aware these LED lights go into the socket one way to power up. They'll fit either way, so if they don't light up during a test (next step) then simply repeat step 3 and flip the bulb 180 degrees to insert it the other way.5) turn on lights to test and make sure they both light up as they should. If not, repeat step 3. IF they do, move to step 66) using both hands, line the map light panel clips up tot he slots in the roof, once lined up, carefully push upward with a slight bit of force to push the clips back in and secure the panel. The Reinsert the round lenses. BE AWARE, the lenses have three prongs, one if fatter/longer than the other two. Line up the bigger prog with the little slot on the back of the lens hole then simply push up to clip the lenses back in.7) Enjoy your new dome/map lighting.
Trustpilot
1 day ago
1 month ago