

✨ Stick, Style, Shine! ✨
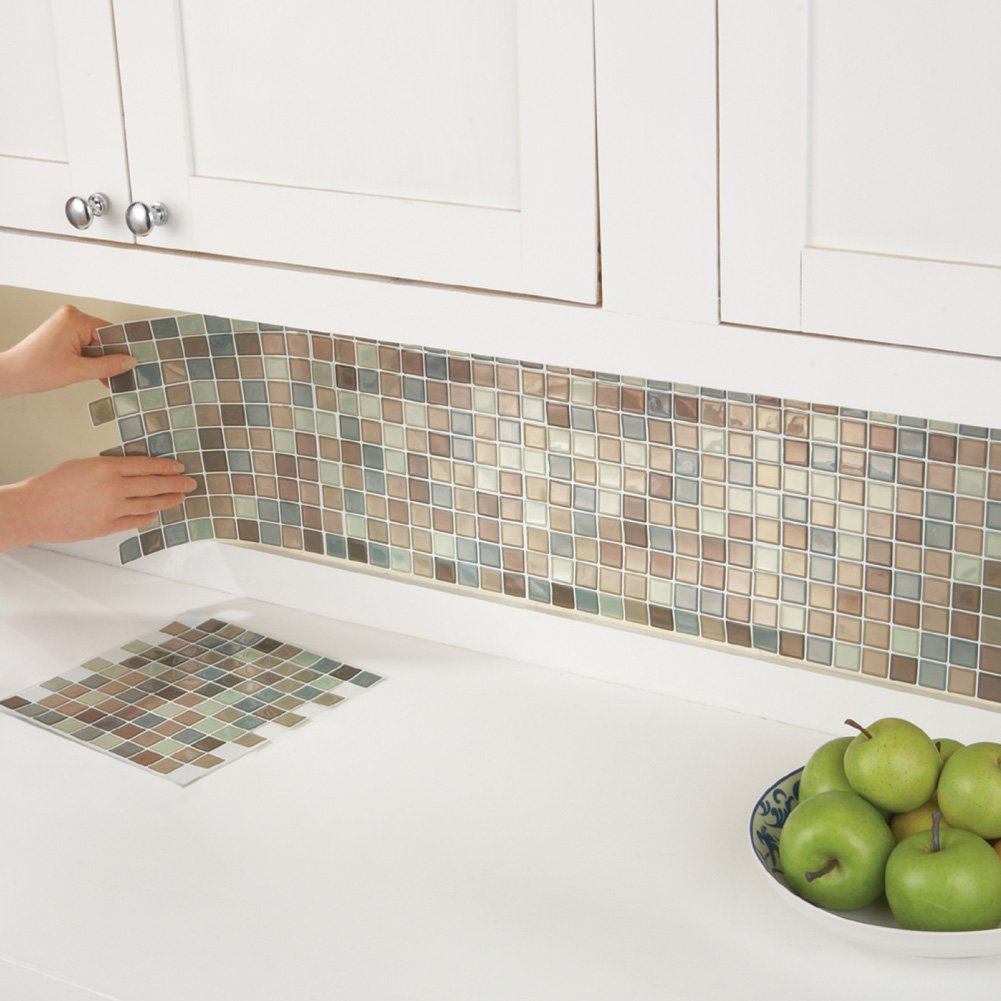
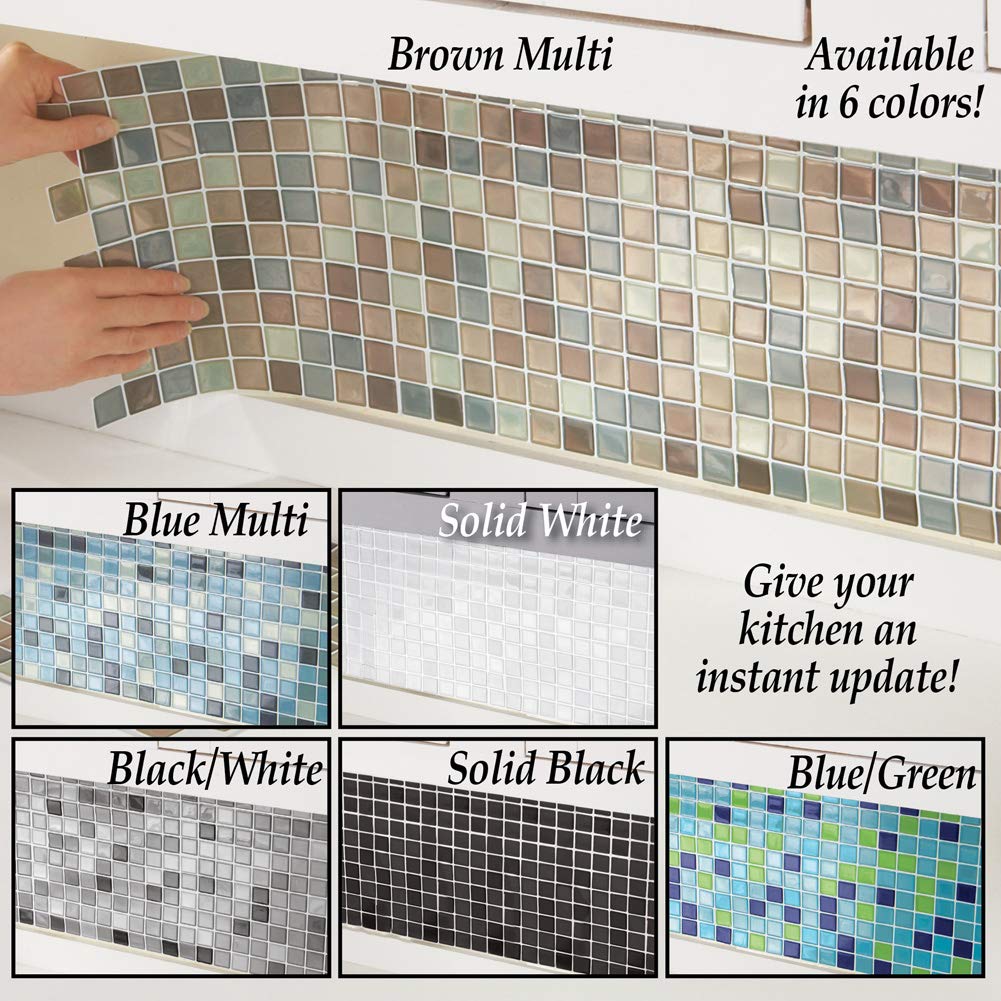
The Collections Etc Multi-Colored Adhesive Mosaic Backsplash Tiles are a set of six 10-inch square tiles designed for easy peel-and-stick installation. Made from durable epoxy, these tiles are perfect for adding a stylish touch to your kitchen or bathroom while being easy to clean and customizable to fit any space.


| Brand | Collections Etc |
| Material | epoxy |
| Size | Medium |
| Color | Brown |
| Style | mosaic-style |
| Installation Type | Peel and Stick |
| Product Dimensions | 10"L x 10"W |
| Pattern | Solid |
| Item Weight | 1.44 ounces |
| Shape | Square |
| Edge Style | Square Edge |
| Unit Count | 4.16666666666667 Sq Ft |
| Manufacturer | Collections Etc |
| Part Number | TLA0108V |
| Item model number | TLA0108V |
| Is Discontinued By Manufacturer | No |
| Item Package Quantity | 1 |
| Batteries Included? | No |
| Batteries Required? | No |
F**D
Big miracle on a small budget.
I've shopped Collections, Etc. For years but was hesitant to try their peel and stick wall tiles. But since I retired, my budget did not include a major upgrade to my kitchen. The manufacturer does not recommend using on textured walls. Well, I have to tell you I faced two challenges. I have very textured walls and my kitchen backsplash had a combination of bear textured and painted wall paper. After viewing some videos I decided it would be worth trying. Thank you Collections (and Amazon) for miracle results for about $68.00. My measurements were spot on. I purchased 4 packs of brown-multi, 6 tiles per pack. The colors are exactly what I expected, they are not chocolate, but softer, and the gray is closer to a blue/gray. Shiny, not quite iridescent, looks more like polished stone. Used a good pair of scissors and got better lines than using an x-acto knife. Also, I used an old credit card as instructed to press them in place taking extra care to press in on the grout lines because of the textured wall. Surprise! They don't mention that once you finish smoothing them in place you peel off the thin clear plastic sheet that protects them while pressing. You must remove this film after placing each one. I hung a flashlight while making sure I kept interlocking the tiles in straight line. When I reached the corners I wasn't sure what to do because the wallpaper was placed across it so I took care to cut in with the razor knife and they fit perfectly.I went ahead and put them behind the stovetop, this was bare wall. I had to press some of the squares for a few nights, but they are holding and I've decided to try a strip of peel and stick caulk for a finished look just below the cabinets and I believe this will also help keep them secure. Absolutely thrilled with the results considering I had rough walls and chunks of wallpaper missing. Achieved in a matter of a few hours over two evenings. 'Before' pics will show the nasty wallpaper and bare walls. I'm not ashamed of my kitchen now. Yes, I placed them gently as I put them on, it's advisable to fold the backing half way, this helps in positioning. Don't rush, line up the grout lines and you'll love them, too.
J**S
Great tiles for a great price!!
We had recently moved and our new place had an awkward shade of blue painted onto the kitchen backsplash. The paint color caused the illusion of a smaller space and even gave my low ceilings an even “lower” feel/vibe. I have used these stick on tiles in the past, just not this brand, for a much larger space in our previous bathroom. I knew the pros and cons of using this type of product, my previous experience had been with a more costly product, that basically gave me the same results of any other reviews that had been of far less priced products. So I decided to trial this product because of the cost and I absolutely loved the color scheme of these particular tiles!I find it easier to use the clear thick film that covers each tile sheet, as my measuring tool instead of a ruler. I remove the film from the tile sheet and place it directly on the wall, which allows me to easily trace out any cut outs with a sharpie, because of the clear films’ extreme flexibility. Once I cut out the objects (outlets etc) I place the clear film directly onto the tile and trace the cut outs with a sharpie directly onto the front of the tile sticker. This method of tracing onto the front side, actually produces an exact outline and snug fit of what is needed without having to remember to flip the stencil cut out or tile over because using the backside causes a backward image (and not too mention a total hot mess).Many of the reviews actually used the product incorrectly by not lining up the next tile directly onto the previous tile placed onto the wall. The edge of the tile with every-other tile block missing IS NOT a decorative style, it is where you would line up the edge of the next tile piece you are trying to place. Please, do NOT repeat their mistakes, mainly because it looks completely foolish and second, by utilizing the product incorrectly is your own fault and is not the fault of the product. Those who did not install the tiles according to the directions then spoke poorly about it in a review, actually give off the perception that they are complete imbeciles.
J**K
A lot of bang for your buck
The first thing I wanna say is that you get what you pay for. This is an inexpensive way to add a little pizzazz to your kitchen. The removal of the backing was easy. What was difficult was lining it up. We had a couple of soups where we had to remove it from the wall quickly and it did remove paint from the wall. One time it removed part of the wall chunk. But after we got going it got easier. Probably the most difficult part for us was around the plugs. For under $100 we got a lot. I would recommend this to someone else who is considering it for a cheap upgrade to their kitchenupdate: 3 days later. So I have had to "restick" some corners. Our walls were newly painted so I assumed it would hold well. Also some of the squares are getting off center. I would change this to 3.5 stars at this point.
Trustpilot
1 month ago
2 days ago