


✨ Build Your Dream, One Tiny Room at a Time! 🏡
The CUTEBEEDIY Dollhouse Miniature Kit is a beautifully designed DIY wooden dollhouse that offers a creative and engaging project for individuals aged 14 and up. With high-quality materials and realistic details, this kit is perfect for collectors and home decorators alike. It includes a comprehensive guide for assembly and is an ideal gift for those who appreciate crafts and miniatures.


| Item Dimensions L x W x H | 9"L x 6.4"W x 8.6"H |
| Size | One Size |
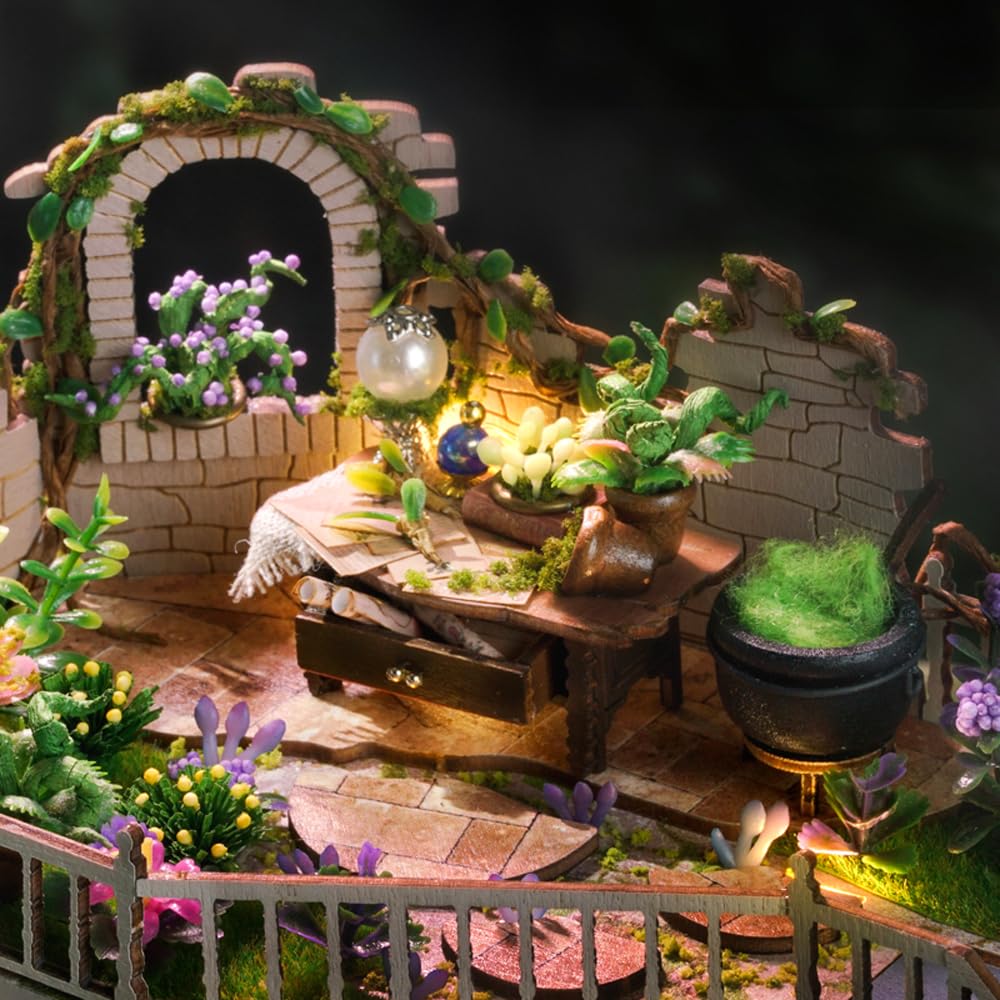
| Style Name | Magic House |
| Theme | Fantasy |
| Color | Magic House |
| Material Type | Wood |
J**R
A great miniature build... I encourage you to be open to modifying when necessary.
I built this for my sister for her birthday. It's the 4th miniature build I've done. It took me about 100 hours, altogether.And, it's a beautiful build.The instructions were clear. The pictures are very helpful.The number one tip I've found in miniature building is: be open to making modifications when necessary. Your build may not look exactly like the picture, but it can still look really great.I made several modifications for various reasons.Some thoughts:+ The triangular roof pieces were not big enough to attach to the other roof pieces. There was an open gap on the roof that was probably an inch wide. This was disappointing. To cover, I glued extra of the green vine over top of it.+ Be careful with the small wooden pieces for the pastry display cabinet. In the process of gluing the cabinet together, one of the pieces snapped into several smaller pieces. So, I improvised and created a pastry table.+ When making the pieces with shelving, it's probably better to glue the smaller pieces on to the shelves before gluing the shelves to the cabinets. I followed the measurements in the instructions, but still had to remove and reset shelving in both cases. Also, I ended up modifying where some things were placed due to insufficient shelf height.+ Due to a challenge gluing the fabric with the pink pillow on the rattan sofa, I used a leftover bunny from a Lego set.+ Some of the paper crafting is intricate. It requires patience, a steady hand, and focus. And even then, there's margin for error. One small mistake in the cutting or gluing can cost you the piece.+ The window film that I received was a bit scratched and smudged. So, I purchased transparency film to substitute.+ The transparent film collects dust. I used a can of compressed air to clean the windows off when done. Note: Be very careful (gentle) when doing this, and make sure your window film is glued well. I ended up using too much pressure and blowing out one of the triangle windows. It also blew some of the interior pieces around, too. Because everything is closed in when put together, it can be very difficult to reset the pieces on the inside.
V**G
Challenging and rewarding. No glue provided.
The media could not be loaded. Much more involved than a typical snap together booknook. I love making book nooks but the fun is often over too quickly and was looking for something a bit more involved. This thing is not too much bigger than my hand and is crammed full of tiny objects - some that have to be assembled from even tinier objects. For example, there’s a sauté pan with lid, smaller than a fingernail that you make by cutting out a tiny disk for the base, a strip to glue around it for the sides, a clear plastic lid, a ring to frame the lid, glueing it all together with a little bent wire for the pan handle and a 2mm bead for the lid handle. I think that alone took me 30mins-1 hr to make!Instructions are not bad - photo of alternate angles may have helped with some steps. Be sure to check all the items to confirm you have everything and to familiarize yourself with the pieces. You’ll need the right tools to assemble this kit - scalpel style knife, magnifier, tweezers, ruler. I found the most difficult things to work with was the fake grass (couldn’t get the template to stick or cut through it correctly) and the gold wire (used for the faucets - the gold kept flaking off).No glue was provided with the kit - luckily I had some left over from a completed booknook.Otherwise, the results were really rewarding. Beautiful piece that provides a really strong sense of accomplishment.Update: tried to switch the power source to usb 6V (this takes 2 x 3V coin batteries) and burnt out the leds - so don’t do what I did! Tempted to rebuy and build again because it is so pretty lit up.
S**A
Time consuming, everything built from scratch, fun as heck!
I had about 10 booknooks under my belt before attempting to build Magic Wand and Magic Coffee miniature.I read all the reviews about how things had to be cut and glued together to make everything from scratch so I knew what I was getting into from the start and there were no surprises. That's why I think I really loved this style of build. It's tangentially similar to a booknook kit, but here everything is kind of freeform. No snapping things into place or just popping out a coffee maker and placing it somewhere. It's very detailed and I like that everything is 3D. Also cool to be able to open it and look at the details inside.Magic Coffee took me about 3 weeks of working on it. Another reviewer said it took them 100 hours to fully assemble and even though I didn't keep track of time spent, I believe it was probably close to that.Magic Wand took me about 2 weeks since it was a very similar build to Magic Coffee. I got tired for making wands so I had to take a break for a few days so that it didn't get annoying, but overall it was a fun build. Lots of odes to Harry Potter. My box had a paintbrush but it was was missing the paint. I happened to have green paint on hand that matched closely so I used that for the window and some trim.My personal supplies included: scissors, B-7000 glue, Scotch super glue, ruler, furniture markers to touch up edges, exacto knife, tweezers, binder clips large and small. Note that neither kit included any of this.The box was not wrapped in plastic and I was worried about missing pieces, but I went through the inventory list and counted every bead, button, and screw before beginning and 99.9% of everything was there with some to spares. I also check the lights 1st thing before every build to make sure that was working. Some wood pieces are warped and therefore I had to use superglue, but for everything else I use B-7000 glue which has worked perfect for all my builds. It was also hard to take the pieces out without splintering so I had to use an exacto knife on every wood piece. I had to keep binder clips on hand for these builds since there was a bit of clamping required to keep things together. I suggest keeping everything separated in the ziploc bags they come in. I had no issues with instructions on either miniature, everything was straightforward (though I'm very good at assembling furniture so following instructions are my strength). I don't ever read the text on instructions because pictures are usually more than enough for me. I am meticulous and patient so these projects keep my creative juices engaged.I really had a blast assembling this and recommend it for more those with more experience.
Trustpilot
3 weeks ago
1 week ago


