🔧 Restore the shine, drive with confidence!
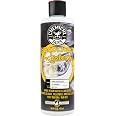
Chemical Guys GAP11516 Headlight Restore and Protect is a 16 fl oz solution designed to rejuvenate and protect vehicle headlights. It enhances visibility for safer driving, offers all-weather protection against harmful elements, and is a cost-effective alternative to headlight replacements. Easy to apply, this product is perfect for DIY enthusiasts and makes a thoughtful gift for car lovers.


| Manufacturer | Chemical Guys |
| Brand | Chemical Guys |
| Item Weight | 0.018 ounces |
| Product Dimensions | 2.5 x 2.5 x 8 inches |
| Item model number | GAP11516SW |
| Is Discontinued By Manufacturer | No |
| Manufacturer Part Number | GAP11516SW |
S**.
The Last Headlight Restorer you will ever need!
I’ve tried my fair share of headlight restoration kits over the years—some that involve sanding, taping, multiple messy steps, and worst of all, applying a clearcoat that either ends up streaky, peels later, or just doesn’t last. Chemical Guys GAP11516 Headlight Restore and Protect completely changed the game for me.First off, ease of use is where this product really shines. No need for sanding discs or a half-hour commitment. All it takes is a clean microfiber applicator and a few drops of this polish. You simply rub it in with light to moderate pressure, and within minutes, the yellowing and haze start to fade. Wipe off the residue, and your headlights are already looking dramatically clearer. It’s fast, clean, and incredibly beginner-friendly—great for cars, trucks, motorcycles, RVs—whatever you’ve got with dull lenses.In terms of quality, the results speak for themselves. My headlights went from dull and foggy to crystal clear with a slick finish that actually lasts. I was surprised at how much UV protection it offers too, meaning I’m not redoing this every couple of months. It has a built-in sealant that leaves behind a protective layer—no need for additional clearcoat or sealant steps.Compared to those other restoration kits that require you to apply on a clearcoat, this is a total time saver and far more forgiving. Clearcoats can be tricky, especially if you’re doing it in a dusty garage or without professional equipment. One mistake and you’ve got drips or a permanent haze. With GAP11516, it’s just polish and go—no risk, all reward.Bottom line: If you want an effective, easy-to-use, no-fuss headlight restorer that doesn’t require extra tools or a clearcoat, Chemical Guys GAP11516 is the one to get. It brought life back to my lights in under 10 minutes and made me feel like I detailed my car professionally—without the stress.
M**H
Let there be light.......
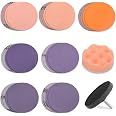
I've been using this product for a while, but have never written a review.This product does work, and in the world of "Polishes" and trying to figure out which grade or grit you need, this is nice cause it's just the right grit rating to do a complete job relatively easily.To Start:PREP0: Open the hood of our car or truck, that ensures you get the best access to the headlight lens, including the top.PREP1:Obviously make sure the lens is clean, which you can do just using window cleaner or after you washed the car or took to the car wash.PREP2: You want to remove the first line of "Haze" here's a trick, use WD40 or Ballistol.. Simply spray it onto a microfiber cloth and wipe down, you'll notice it takes off a layer, but not ENOUGH to make the lens clear, but it DOES help and sort of "Pre lubes" the surface a bit.---Note -- IF the lenses are severely oxidized, like it's very rough and pitted to the touch, and almost completely faded out, you may need to do a wetsand prep using something like a 3000/5000/7000 grit sandpaper, THEN start the Chemical Guys' polishing routine with this product. This product won't remove that harsh first layer of oxidation, or it will take forever, as it's a very medium to medium fine polish. If you have to wetsand first, use a spray bottle of distilled water, wet the lens thoroughly, then first go with 3000 and work up to 5000 and maybe 7000, constantly lubing with water and wiping off the excess with a clean towel. After you go through the 3 stages then apply this Chemical Guys' polish routine. But, for most people they won't have to do this. But if you have to do this, prep3 is critical below: Masking.PREP3: TAPE: It's best to get some blue or green painters type masking tape and tape off the light from the painted areas of the car. Don't over think it, it's not like you're painting anything, you just want to mask off the painted areas from the headlight to keep the bonnet from bumping the paint. And from the material getting into areas you don't want to..PREP4: HAND POLISH: If you're using a foam bonnet or a microfiber bonnet (or a towel) this will take longer, but you have more control of the "product" and it doesn't fling off. Simply put some on your foam bonnet and polish it in. Keep working it, and sometimes you can have a spray bottle of water to lubricate it a bit, and continue to work it in. Wipe it off, try a second coat doing the same procedure. Remove the tape, Let it DRY, then use a clean cotton cloth to remove the excess.. Cotton will not create the static like Microfiber does and it won't remove any protect layers of the product, leaving it treated, as this Chemical Guys' headlight restorer does have a UV protectant in it. If you don't have a cotton cloth, that's okay, just don't press too hard, just lightly buff it and remove the haze.. Voila.. Clear.PREP4A: MACHINE POLISHER. If you're using a rotary polisher, whether it's a large bonnet type designed to polish, or a smaller one, like a special tool that holds a 3" flat bonnet, or a smaller bonnet (Like the ones you use on Drills, the round type) you have to be a little more careful applying the product as it'll fling off and make sort of a mess. So you put it on the flat or round bonnet, spread it around on the bonnet and the lens and SLOWLY work it in, don't go full blast or you could possibly burn the plastic or the paint surrounding the headlight.. So you want to be careful not to hit the painted areas. HENCE the masking.Work it in slowly, and then gradually increase the speed.. You don't have to press real hard, as that just makes the bonnet lose control a bit.. Just a nice light pressure and allow the rotary device to do the work. Also, you can rest assured your polishing bonnet has probably absorbed some of the material, especially by the time you get to the 2nd headlight. That being said, you can continue to polish a bit without having to apply more product. This product seems to not dry too quickly and has a slight oily texture to it so you can work it in looking as though you don't always have to have a fresh "Haze" of the product on the light lens.. Again, if the bonnet is fairly saturated with product you should be good. Again, like above, you can also spray some water on it and continue you on that way as well. Be sure to avoid hitting the painted masked areas as much as possible, bumping them slightly won't really hurt it, but when you're increasing the speed just be sure to avoid them, you don't want to "burn" the paint.Remove the tape, let the product dry to a haze, and slightly wipe clean with a cotton or microfiber towel.Tip: I buy high quality paint brushes, like 2", 3" wide, the stubby kinds, which are great for after a procedure like this to wipe around the light lenses, to get any chalked product out. If you have an air compressor that's a bonus too. Just use the brush around the edges, then hit it with an air compressor.. Should look great.Like these: https://www.amazon.com/Wooster-Brush-Q3211-2-Shortcut-Paintbrush/dp/B099KL78FB/ref=sr_1_6?dib=eyJ2IjoiMSJ9.SUZ3kYDsniTGpWjAgfwOX1LQJ_Yq8wMpc0b83Zaw7faaGpmqa2xEHA1lQlXw8WCpNNesowQGa4tnPmKzSFUxH4WeQ-PxOS2JiXDG5OTNhlJEeCY26NFkoXBmclsJqhfi_V40EU8qRkS1Ma1pG7dJj_YrBToUPaKAtvF_K_rStd0c9Nw1bx6ZzDcodmc5RYwWr35jsUugVCnPN4B1GPu0DDxfKqTf9zxIzakWAGvtjGiZbORcA_bS276zEYyIe-AowBrSuZC0KrZ29lePdIzQagGLolWCuvOC7LTBLINBWe4.wRl7tSfIBoecdoW846dL8XItJGA-99c2tpA8mgHC09c&dib_tag=se&keywords=stubby+paint+brushes&qid=1733415295&sr=8-6
O**R
Good enough. But pricey.
Seems like it helped my headlights.I'm not completely wow'ed by the results. But maybe I need to give it a few tries.
K**L
Cleaned Up Like New!
Great product that did exactly what it sought out to do. I purchased with the intention of removing an awful stain that came about on both of my headlights. Directions were straight to the point making it really easy to use. In my case I utilized an applicator pad, placed 6 dots around the headlight assembly, scrubbed until clear then reapplied as necessary (2 times over). This stuff really cleaned up my headlights really well. I would recommend and I’m happy to use this products on my other vehicles.
J**C
Give it a try
Worked well but not a miracle wipe on product. My lenses were not really bad but after giving it a try just rubbing it in it was clear more effort was going to be required. I then taped off the lights and applied water and used a 3000 sanding pad on a drill to scuff them up and then used an orange pad on a RA polisher to buff them out using the product. They are now nice and clear but time will tell how well the UV protection aspect will stand up. I think I'll probably buff the out again in 6 months and should only need the buffing this time.
A**.
Works only half way - one cannot reach full clarity of headlight, and repair does not last long.
I used a different brand before, one of those which come with a set of polishing disks, a polishing solution, and you use a drill to gradually get rid of surface roughness. That one worked very well but it was quite of a chore. The idea of this one was attractive. Indeed, it works very clean to get rid of initial haze. However, it seems to be unable to reach a perfect clarity of headlights, and the effect of surface refurbishing fades away in 4-5 months. In a way, it is a quick and easy fix which takes you half way to full clarity of the headlights and does not last long. I am going to order a more reliable and proven replacement rather than using what I have left in the bottle of this one (which is almost the full bottle...).
Trustpilot
3 weeks ago
2 days ago