✨ Transform your space with marble luxury—no contractor needed! 🏡
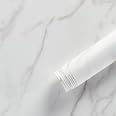
Instant GranitePremium 36” x 144” vinyl laminate offers a realistic honed white marble look with a matte finish, designed for easy peel-and-stick installation. Its durable, waterproof, stain- and heat-resistant PVC material ensures long-lasting beauty and protection, covering large surfaces with minimal seams for a sleek, modern upgrade ideal for kitchens, bathrooms, and beyond.


| Item Form | Sheet |
| Grade Rating | Residential |
| UPC | 705332558549 |
| Number of Items | 1 |
| Manufacturer | Instant Granite |
| Part Number | IGHM12 |
| Item Weight | 3.74 pounds |
| Product Dimensions | 144 x 36 x 0.01 inches |
| Item model number | IGHM12 |
| Size | 12 ft |
| Style | Modern |
| Finish | Matte,Natural,Smooth |
| Pattern | Marble |
| Installation Method | self-adhesive |
| Number Of Pieces | 1 |
| Coverage | 5184 sq inches |
| Special Features | Waterproof |
| Batteries Included? | No |
| Batteries Required? | No |
M**S
Amazing transformation, durable, but don't make it your first peel and stick project
Someday I am going to take a scrap of my left over and do a burn test to find out at what point this stuff melts or shows damage, but it has held up to hot from the microwave and hot beverages with no problem. And wow - what a transformation! In a few years we plan to do a real kitchen renovation, but I couldn't stand our countertop anymore - it was a dark, dingy muddled green. After reading so many rave reviews, this seemed like an affordable short term solution without too much hard labor. That evaluation was spot on. I love how it turned out. I chose the matte white marble because I did not want anything shiney that screamed plastic. This product, along with a color changing paint job on the walls, has taken my kitchen from drab and tired to clean, bright and fresh. Good investment of $130 dollars and about 12 hours labor that was not back breaking - kind of fun actually (other than the blasted sink). Would have been shorter installation time too if I did not have curved countertop and attached back splash. Those two things added a lot of time. Yes, I know - if I had the tools and skills I could have installed new countertop in that time, but I don't. My philosophy is make things as nice as you can, within your limitations. Not buying new countertop and paying for skilled labor until the real reno.So now the tips and tricks. First - don't make this your first peel and stick project! Buy some cheap contact paper you can easily remove and apply that first for practice if you have never done anything like this. I have been using contact paper for 50 of my 60 years, and that experience was invaluable. Peel and stick is the only thing this stuff has in common with contact paper though. This is thick car wrap grade vinyl; a huge cut above. Know that having a hair dryer is essential for lifting and resticking and smoothing. I started with the smallest easiest countertop for practice and worked my way up to the hardest, the sink countertop. IF YOU HAVE THE TOOLS AND SKILL TAKE YOUR SINK OUT! I do not, so I had to go the cutting around and caulking with silicone route. I ended up tearing the vinyl where it was weakend after cutting the sink hole. Patched it as best I could and it is in an inconspicuous spot but that would not have happened if the sink was removed and I had not had to work around the faucet. If you have to leave the sink in place, a sharp utility knife is essential when cutting around the sink, and don't do the final cut - leave yourself and inch or so of extra margin - until the rest of the counter top from end to end is smooth and in place. I had to do a lot of adjustments on the sink piece. The two smooth non sink countertops were easy peasy though, and the sink one would have been too if I could have taken it out. The four foot sink counter top took me as much time as 9 feet of straight countertop did! In the end though, totally worth it and it is holding up great, not unsticking at all, even around the sink (remember to use clear silicone caulk to seal the gap.) If it does start to peel a bit I'm pretty sure a quick touch up with the hair dryer will reseal things. Love, love, love.
E**I
great looking product
great looking product
A**R
works great!
Easy to install. Protects the surface. Does just what we were looking for!
M**K
It’s average
I wasn’t super impressed! Not easy to work with.
M**N
Beautiful
Much better than expected!! I do recommend using a dryer/heat to secure corners but was very easy to work with, beautiful in person! Going to order more to cover all counters!!
B**W
This looks just like marble!
This product looks just like marble. It's VERY sticky so go slow when working with it. It is nice and thick, not flimsy. If you make a mistake when installing, just gently lift it up and reposition it. It's pretty tricky getting around corners, so again go slow and take your time.
D**S
Actually Amazing
Used this to resurface an old table that had become sticky from the lacquer and wasn't worth the effort to strip down and refinish. Definitely thicker than your standard contact paper and it laid flat and even though I couldn't remove all the bubbles in the first go, after 24 hours, it looked perfectly flat. From a distance it absolutely looks like marble and it's super smooth, so when it's a little wet from being cleaned, it shines like marble, but it certainly doesn't have the cold feel of marble, so you won't really be fooling anyone that actually touches it. Holds up well to heat - we've put hot foods down on it and there's no bubbling or blemishing at all. I've been really impressed with how durable it is. My only reason for knocking a star is that I have struggled with getting some of the edges to lay flat - I wrapped it around the edges thinking it would give a more "tabletop" effect, but some of those have lifted and I have to press it down. Since it's on the underside of the table, I might be able to staple them or secure those edges with another adhesive, but if I was using this on a rounded countertop where I couldn't secure that edge, I'd be worried about it lifting. I may try using a heat gun instead of a blow drier to see if I can get it to be a little more pliable and get the glue to stick a little more. Be patient with measuring and laying the surface down. I've worked with a lot of adhesive wall and furnishing papers, so I was comfortable with the application process, but if this is your first time, you'd probably want to get a cheaper roll of contact paper to make a template, practice placement and application before using this because it is pricier, thicker, and sturdier than other rolls of adhesive decorative papers.
A**E
Perfect. Seems durable.
I moved into an older house and plan to renovate everything. Some things are more important than others. I’d eventually like to get granite countertops for my bathroom but the counters were absolutely hideous. This is a beautiful temporary fix. I hope it last years and could even be a permanent fix. My bathroom looks 100% better with paint and this new look for the counter. Love it.
Trustpilot
1 month ago
1 month ago