


🚴♂️ Elevate Your Ride with Precision and Style!
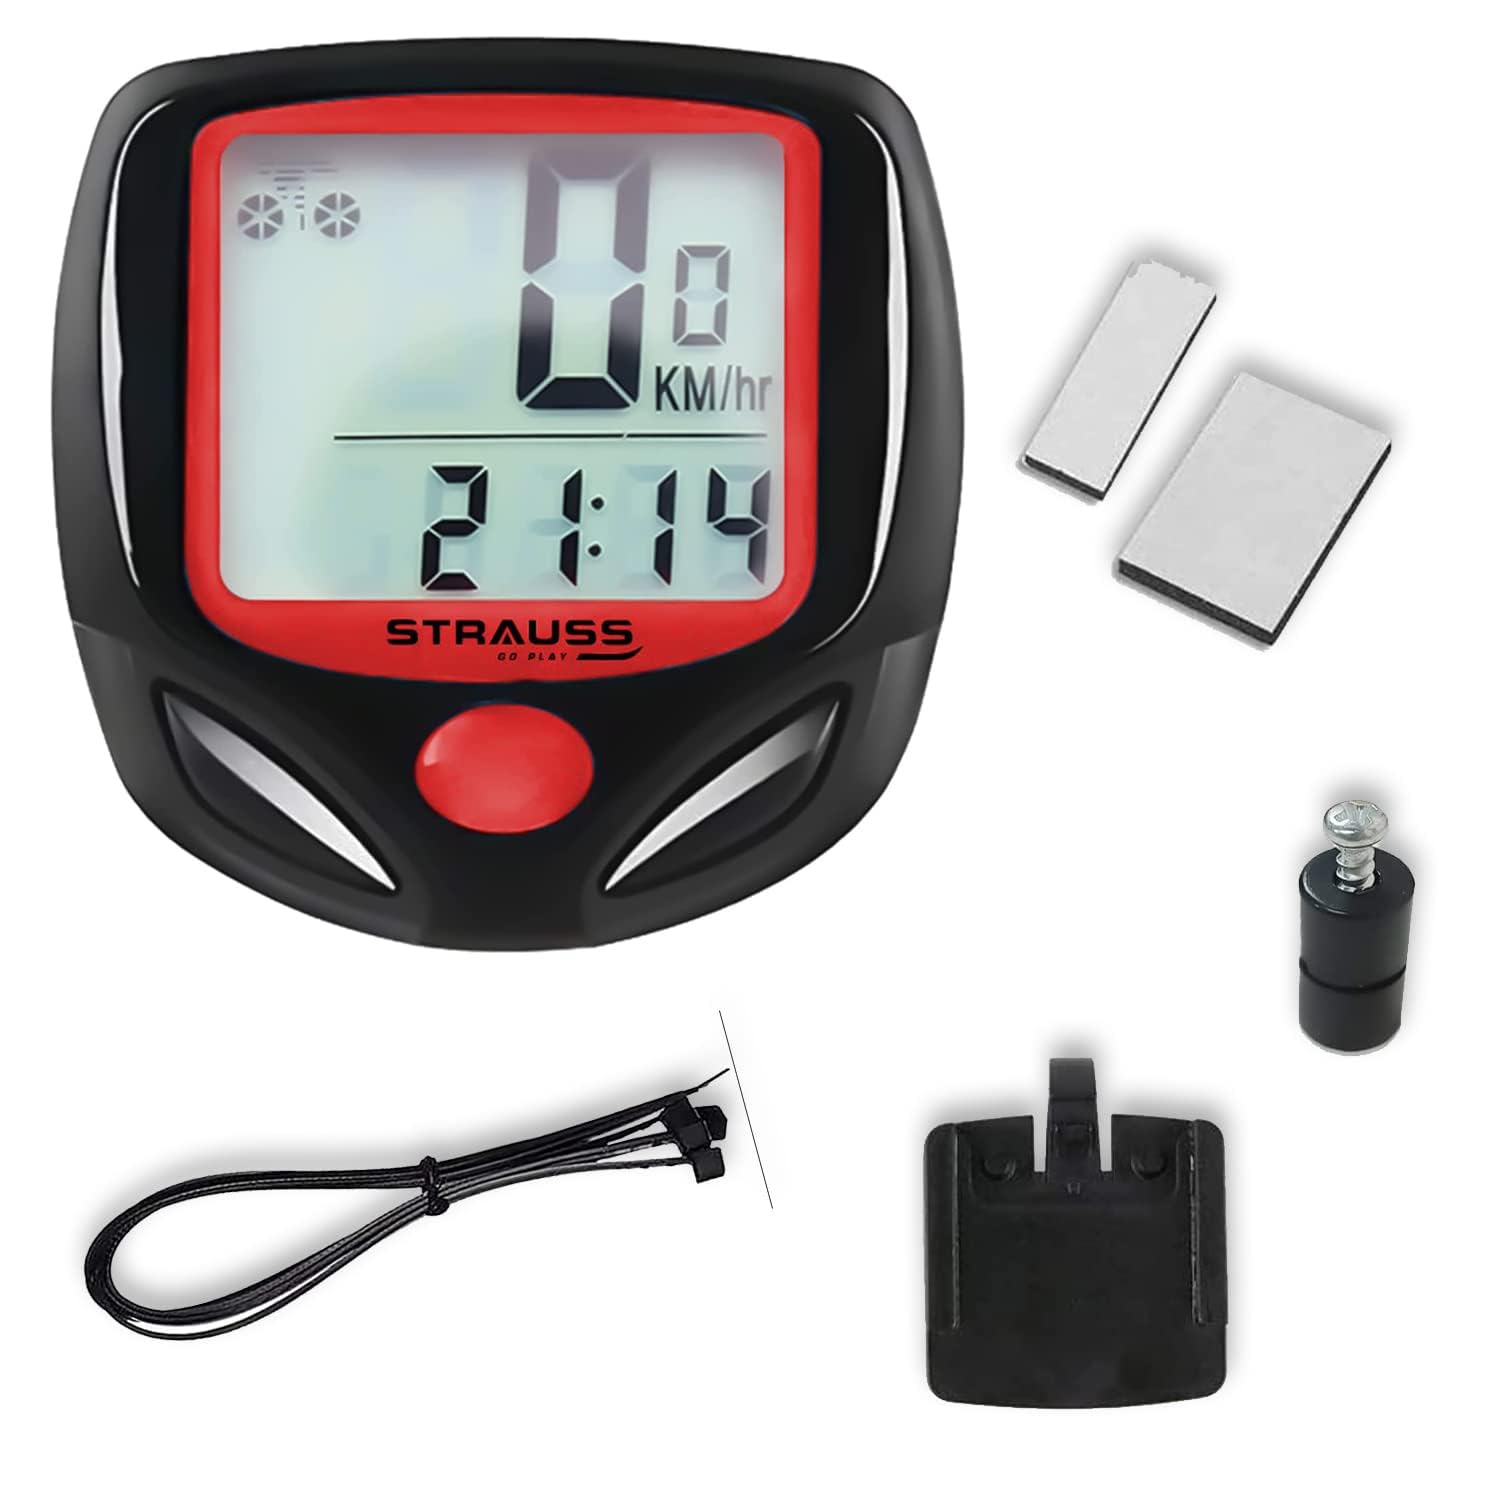
The Strauss Bicycle Computer Odometer Speedometer is a lightweight, waterproof cycling accessory designed for serious cyclists. With a clear LCD display, it tracks speed in both mph and kmph, riding time, and distance. Its compact size and shockproof design make it ideal for all terrains, while the auto sleep and wake-up feature ensures efficient battery use.
| Colour | Speedometer,(Black/Red) |
| Sensor Type | Speed Sensor |
| Display Type | LCD |
| Human Interface Input | Buttons |
| Mounting Type | Handlebar Mount |
| Display Size | 1.8 Inches |
P**R
Quality is Good, No doubt value for money
Battery life is good, appearance if good, performance is also good, lot of modes available like odometer, speedometer, time, stopwatch starts when the tyre is moving, and more. The price is very low despite its quality.
A**R
Good useful product, value for money
First off, this is a wired speedometer / odometer for a typically sized bicycle. I ordered thinking it was wireless, but when I received it, I realized that this was a wired one. I will explain what that means shortly. I wanted to return it, and order a wireless one, but when I search on Amazon.in, I found them to be way more expensive than the wired ones.Secondly, the product page mentions that it has a backlight for dark / night viewing. However, I could not find this functionality, and the manual that came along with the product also does not mention this functionality.Coming back to how it works: there are 3 distinct parts; (1). a magnet that is attached to the spoke of the wheel (either front or back), (2). a magnetic sensor that is attached to the front / rear fork in close proximity to the area of the spoke so that when the wheel rotates, the magnetic sensor can sense the magnet (there is a wire from this to a display holder that is supposed to be attached to the handle bar), and (3). the actual recieving and display unit that fits into the display holder (this is removable and fit back as required).A wireless one will not have the wire that connects the magnetic sensor to the display holder.How it works:Although some reviews mention that installation is tough, it is easy once you realize how it works. With each revolution of the wheel, the magnet comes in close proximity with (but obviously should not touch) the magnetic sensor. The magnetic sensor detects the magnet, and sends a signal to the display holder which has 2 pins that come in contact with the corresponding pins of the display unit. In this way, the display unit gets the signal of one revolution, and the rest of the computations and display are taken care by the display unit.Installation:There is a product manual included with the product which has the installation, but the steps are explained very briefly. So, let me spell it out here in a bit more detail. Firstly, the order of installing the parts is very important. Secondly, there may be a bit of fine tuning required, so be prepared to not completely "fix" a component before verifying that the entire assembly works.Step 0: Make sure that the battery is installed in the display unit (mine came with the battery already inside the compartment). The display should show something when the right key is pressed. Next, slide the display unit onto the display holder. Then, as if to simulate the wheel rotation, keeping the magnet in close proximity (the manual says 1 mm, but I guess 1 cm works), move the magnet in a circular motion by hand so that it comes near the magnetic sensor with each rotation. The display shoud start showing the speed increasing or decreasing. Once you get this working, it is easy to install the entire product.Step 1: Install the magnet on the a spoke so that it is close to (but does not touch) the fork. One part of the magnet part has a screw, and the other side has a shiny magnet. The shiny magnet side must face the fork inside. Now, the manual does not do a great job at explaining how to install the magnet. The magnet part has a screw. Using a screwdriver, loosen it, and the magnet part can be pulled into 2 parts. Fit the 2 parts back so that one part of this is on one side of the spoke, and the other one on the other side. Put back the screw and tighten it.Step 2: Install the magnetic sensor on the inner side of the fork so that the magnet comes in close proximity to the top or bottom of the magnetic sensor. Use the double sided tabe for trial and error. Do not assume this is the final position. Make sure that the sensor does not touch the spoke or interfere with the wheel rotation.Step 3: Take the wires of the mangetic sensor unit, and arrange the wire so that it does not get entangled with the wheel. The other side of the wire which is the display holder, should be put onto the handlebar at a location that is convenient to view the display. Again, use the double sided tape which is under the display holder unit.Step 4: Slide the display unit onto the display holder until it slides all the way back, and you hear a click. The idea is to get the pins of both the units to be on top of each other.Step 5: Take a trial ride, and ensure that the unit displays the speed approximately.Step 6: If something is not right, then rectify by adjusting the positions of the units involved. Once it is confirmed it works, use the plastic ties provided to: Secure the magnetic sensor, keep any loose wire part tied to the fork, and to secure the display holder unit.That's it.Now, a couple of further points. The modes of operation of the display unit can appear complicated. Make sure to go through the manual, and get comfortable with the functionality of the left and right buttons of the display unit. This can be done at a comfortable place by sliding the display unit off the holder, and trying out the buttons. Next, as mentioned in some of the other reviews, there is a chance of theft where the display unit has been stolen by sliding it off the holder. So, if you want to be extra safe, remove it after each ride. Be a bit careful when you slide it in and out because the double sided tape can come off.
A**R
Bicycle meetre
Priduct ok, but two times i retuned, fitting tool not available, missing.. Dont buy
A**R
Simply exceptional!
It's a very functional device at a very low cost! Quite simple, easy-to-use and accurate. One issue is that there is no backlight, so the display might not be visible at night. Another issue is that the setup instructions need to be more detailed. But you can easily install it following other reviews and videos on this product page. One thing I didn't particularly like is securing the devices with zip ties. It doesn't look very sleek and is not reversible (you have to cut the zip ties to remove the product). It would be better if they had provided some other mechanism such as tight rubber bands. But since we don't have to remove the product very often, it's okay.
S**S
Can be way better
This is a nice gadget which almost perfectly works.Accuracy: I found it to be almost perfect since it relies on the diameter and circumference of the tyre. Once you enter it, you be rest assured.Quality; It's a handy gadget and won't take much space. Wires are pretty delicate.(My cable got torn in the first week)Performance: Very good performance.Improvement: A led display of the screen would be great. At night, you can't read the display.Overall brand name might confuse you but be aware that it's a China made gadget
V**K
Excellent one, perfect as mentioned
Good one, it works as mentioned.not difficult to mount on cycle following the provided instructions.
T**K
Good for shorter rides
This works well for short rides withing 15Kms. Once you cross 15 or 20kms, sometimes it behaves weirdly. Stops tracking speed and distance intermittently, and as a result incorrect data is logged. Good for only short rides at this price range.
A**G
Very good
Another time please give more strip locks
Trustpilot
1 month ago
2 months ago