

🔥 Upgrade Your Hearth, Ignite Your Style! 🔥
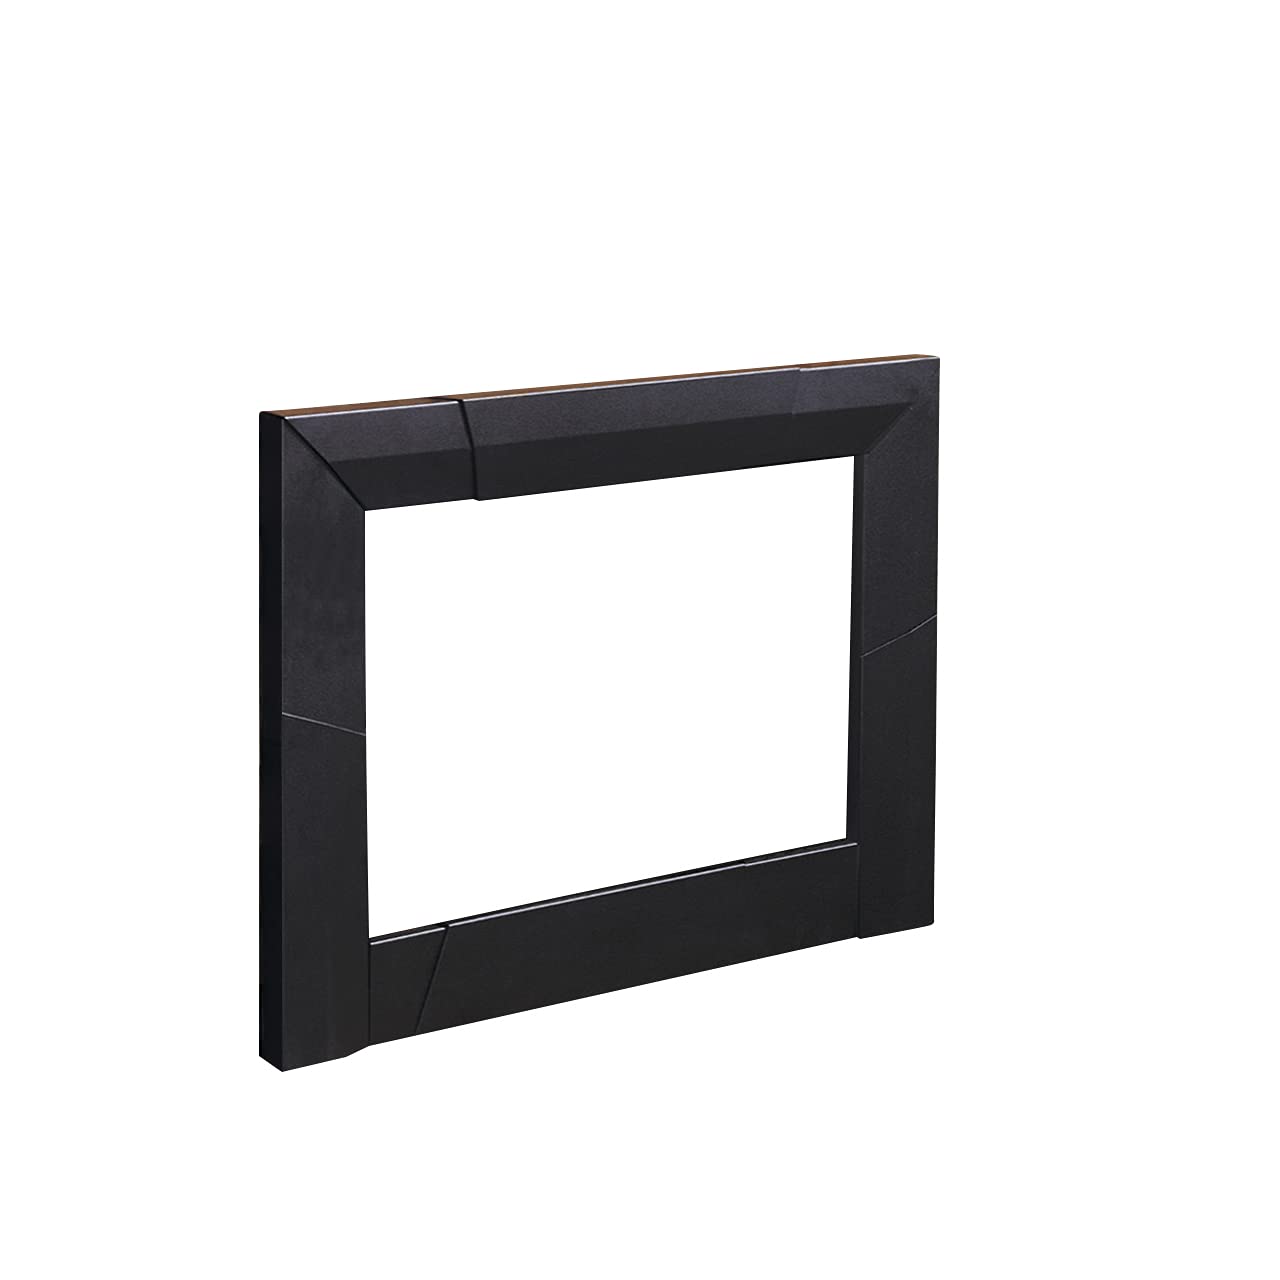
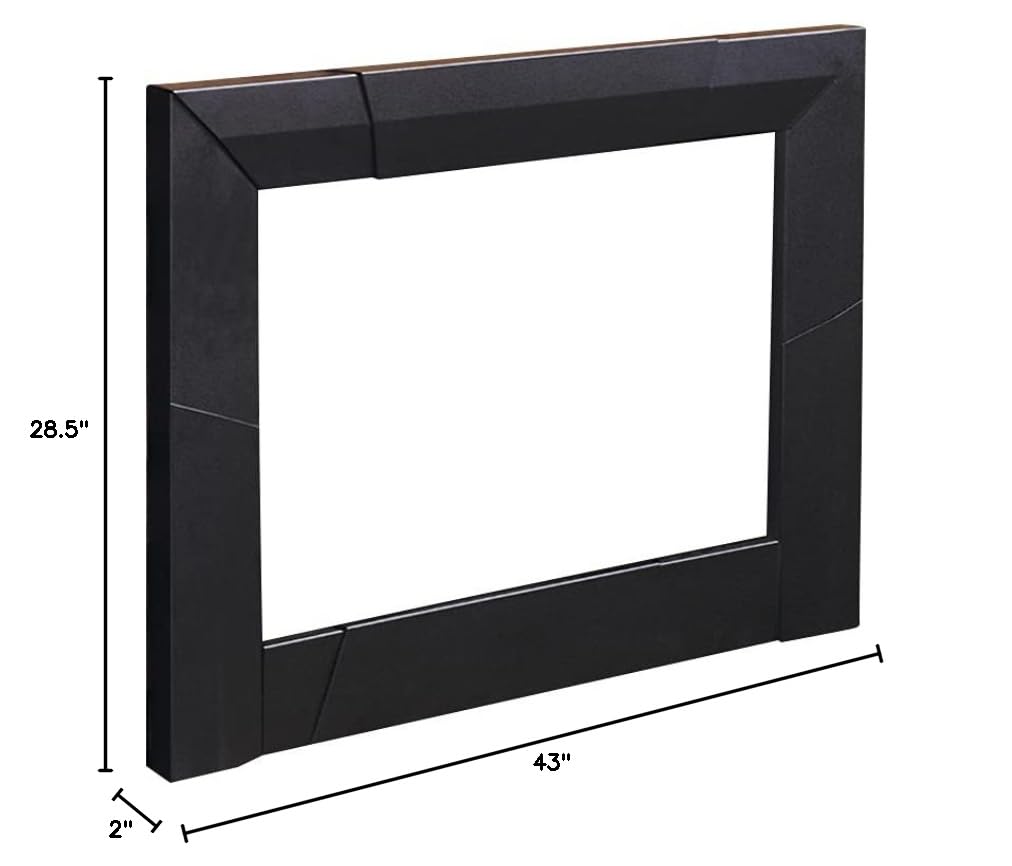
The Dimplex DFI Series Adjustable Trim Kit (Model: DFI23TRIMX) in sleek black is designed to enhance the aesthetic of your fireplace. This adjustable trim fits the DFI2310 Firebox insert, ensuring a seamless look. With easy installation and a wipe-clean surface, it combines style and convenience, backed by a 1-year limited warranty for lasting reliability.
A**N
Trim Looks great, but screen will not hide a dirty white firebox
Received Dimplex trim kit and fireplace insert yesterday. As said by some other reviewers, the written instructions were worthless. My husband finally figured it out using only the picture and a fair amount of "discussions" with himself. Took less than two hours but the end result was worth it. We have a 36" x 27" fieldstone fireplace opening with a white firebrick interior and the trim fits perfectly. The screen is a bit chintzy, but does the job. Very realistic looking at night. The only thing I would suggest is that if you have a wide fireplace opening and you purchase the trim with the coordinating Dimplex fireplace log insert, you might want to paint the interior firebox black, if it isn't already. The 23" wide black logs and insert sit in the center of the firebox and our dirty white firebrick interior stands out like a sore thumb around it during the light of day, even with the screen closed. I'm hoping to stain the interior firebrick black so the insert will blend in better. Can't really complain for the money.Updated two years later: As we never use the heating element in our insert, I purchased and installed a foldable black cardboard presentation board instead of painting the firebox black. Fits perfectly. Looks and works great. Much easier than scrubbing and painting the dirty white brick walls. Been using for two years with no problem. Not recommended if you ever use the heating element.
X**C
Pretty nice once assembled
As many reviewers have pointed out, the instructions for assembling this are very poor Im not a real handyman but thought Id throw some assembly help out there to assist others:1. Unpack all the pieces, go through the screws and you will find two that are slightly larger. Set these aside for attaching the trim to the insert later.2. Assemble the frame (the individual pieces are marked with their respective locations, "Top Side" etc. Mark the screw hole sites for the size you will need and pay attention to where they are located on each of the trim pieces. Marking them with some removable chalk, etc will help keep track of them.3. Thread the L-shaped poles through the loops in the screens (make sure the screen handles are oriented to the middle). Remove the Top Side pieces and putl the small end of the L-shpaed pole through the brackets on the side. There are several holes in these brackets depending on the height of the fireplace and thus the trim kit. I needed the smallest size trim kit setup to fit my fireplace so used the top holes in the bracket. Reassemble the Top Side pieces back with the other trim pieces and run the long ends of the L-shaped poles through the bracket in the middle piece (these are slightly offset so you can run one L-shaped pole on top of the other). Another bracket is provided in case you need to place it lower for taller fireplaces/trim kit settings (if you use the smallest size for the kit you won't need this).4. Assemble the trip now by lining up the screw holes for each of the trim pieces according to the marks you placed in Step 1. Make sure they are lined up and not offset between the two trim pieces you will be screwing together or the screws will be at an angle. Screw together all the trim pieces as shown in the instructions.5. To attach the trim to the fireplace insert, first make sure the fireplace insert is not plugged in. Get someone to help you and turn over the fireplace insert. Invert the assembled trim kit as well and line it up with the screw holes in the bottom of the fireplace insert. Measure the distance between the insert and the front of the fireplace to know where to place the support legs of the trim kit. Also measure the height of the hearth relative to the bottom of the fireplace and raise the adjustable feet on the insert so that the insert will be roughly level with the hearth.6. Attach the trim kit support legs to the assembled trim using the two large screws you saved earlier and then to the insert box bottom. Carefully (with your helper) turn the trim kit and insert back over and carefully place into the fireplace. Check the switches and set back for the remote and heat level you want.Again, Im not a pro so take all this with a grain of salt, just what worked for me. Once assembled, the trim kit itself is pretty solid and reasonably well made and looks pretty decent with the DFI2310 insert that i got as well. Together the cost was ~$500 and the effect is pretty close to a gas fireplace which was going to cost us at least $5000 to refurbish our fireplace appropriately. Not sure why manufacturers in China cant put together decent assembly instructions but this is pretty typical in my experience.
L**R
Beautiful Dimplex DF123 and Dimplex 23" fireplace
I love fireplaces in a home whether Arizona or Wisconsin. Unfortunately, the time came when I no longer was able to put the logs on the fire. After a year without the pleasure of a fire in my fireplace, my children suggested an electric one. Had my doubts, but after it was installed and turned on, I was so thrilled. Not only does it look beautiful, but it gives off adequate heat. And,I am happy to say, that I do not have to worry about my great-grandchild getting burned. Dimplex deserves every star(beauty, heat, safe, reasonable, and fulfilling. Thank You Dimplex. lmeagher
A**R
Extremely frustrating!
Horrible; this item was definitely returned by someone else; bent and scratched all over!
T**E
Looks really good - But expensive for what you get
We bought this to fill in around our new Dimplex Electric Fireplace. The material is quite heavy, which is nice. But, for what you get, it seems to be a bit pricey.It went together fairly well. Just the bottom middle piece gave me problems (nothing a rubber mallet couldn't solve).It looks very nice around our fireplace. But I really think it is overpriced.
J**I
Best I have seen
We live in southern California so an open face fireplace is a waste of energy, not only that it is most places. We converted to gas logs that was no better we had to open a door or window to make it draw air correctly, if we did not the gas fumes would chase everyone out of the room. The electric flames look great, it even heats a little or will take the chill off the air( all we need). Best of all the fireplace is now blocked off on the roof and blocked in the flue, no more pasive heat loss, as dampers allow a lot of cold air in when there is no fire. I love this fireplace. I am buying the trim kit. We have solar panels so the heat is free! I am a contractor so it was easier for me to assemble. Otherwise you need to be a very handy person.
A**R
Great trim fit
This trim kit was not made for the fireplace that we bought but it is very adaptable and looks great
S**E
Bon produit
C'est le deuxième appareil Dimplex que nous achetons. L'effet foyer est surprenant. Facile à installer et facile d'entretien. Nous le recommandons.
L**U
Pending. ...
Pending if it fight the Electric Fireplace I order
T**D
Great price
I don’t have an insert. I just used it as a cover for my wood burning fireplace. Good quality for the price however the instructions are near impossible to follow.
A**E
Adjustable trim
This trim could have been a little taller height wise but I made it work.
Trustpilot
2 months ago
3 weeks ago