


🚗 Drive Your Innovations Forward!
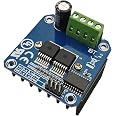
The HiLetgo BTS7960 43A High Power Motor Driver Module is designed for Arduino enthusiasts, providing a powerful and efficient solution for controlling motors. With features like bidirectional control, real-time voltage monitoring, and a wide voltage range, this module is perfect for smart car projects and other high-demand applications.
W**U
Worked great. For medium to small torque application.
Documentation is slightly lacking. Controls one motor bi-directionally. I used with an Arduino Mega (2 pwm pins, 5v times 3, and GND). I used them for a large robot (IGVC so ~100 lbs) and it worked very well on carpet and pavement but unfortunately the thick grass caused the bridge to eat about 8 out of 12 VDC so the wheels wouldn’t break away. They were undersized for this application but the linearity of operation in both directions is excellent. Had no issues with heat. All 4 came in excellent condition. Great for a medium to small torque application. I’ll find another use for them.
R**Y
Works, nice features , quality is not so great.
First off, it works perfectly for my low current needs. This can be use to individually control the speed of two separate motors, unidirectionally. Or, one motor bidirectionally. This is done thru two pwm signals and two enables. I didn’t use the overcurrent signals. And give it 40ma of 5v as well. When driving one motor, hold one pwm to zero while pwm the other. To reverse, do the opposite. Easy peazy.Now the quality. The heat sink was rattling. I decided to take off and there was a little blob of solder under one chip, so even if I tightened the screws it would not make good thermal connection. But my bigger concern was that the heat sink could potentially short out other vias, not the ones to conduct heat but rather ones for the circuits! For this design flaw I’ve removed one star. Turns out for a couple amps I don’t need the heat sink. If you need to push 20+ amps, then this would get important. Addition of a silpad or cutting clearance for other vias would be even better with some heat sink grease to boot!Can’t beat the price though, great value even with its short comings (pun intended)
G**E
Excellent motor controller for Arduino setup
I’ve had no issues and used a few of these controller so far. Currently 2 are running automated gates and have been cycled hundreds of times without failure.
A**R
Dirt poor design and assembly. Two units non-functional upon delivery.
If you read reviews; you already know units include bent header pins and overheating issues. However this review will address root cause of fundamental design and manufacturing deficiencies.Header pins are bent because all units are placed directly in ant-stat bag without protection; 80:20 chance you will receive damaged header pin.More seriously are design and manufacturing issues that render device non-functional and limit advertised performance. Design uses BTS7960 IC, which represents good performance H-bridge driver. However PCB design accommodates poor thermal heat transfer mechanism from chip tab to heatsink. PCB uses array of vias to transfer thermal flow to aluminum heatsink. This approach is completely inadequate to remove sufficient energy from chip for operation anywhere close to 43A as advertised. To make things worse, design includes no thermal pad under heatsink to electrically isolate or increase Q-flow. Both units purchased non-functional out of box, with direct short-circuit between motor output terminals. This short-circuit was due to fact heatsink aluminum was bolted down directly against bare PCB vias, without any electrical isolation pad. Apparently designer intended to use aluminum heatsink thin layer of anodized coating to provide reliable electrical isolation between motor outputs (which most likely was sufficient to pass factory testing). This problem can be corrected by adding thermal pad under heatsink. However Q-flow problem is still insufficient to remove energy for full current operation.Solution: Remove both IC's from PCB. Machine two square holes through PCB directly under IC's thermal tab. Place copper heat transfer pads on back of IC's to conduct Q-flow through PCB. Place silicone isolation pad between copper pads and aluminum heatsink. Finally place 50mm fan on threaded spacers directly under heatsink fins using existing PCB mounting holes. Now unit will function as intended.
D**S
Great for the money
Limited voltage use, about 8 to 22 volts. If this is ok it is a fine driver. I am using 3 to drive 3-phase magnet coils and they are fine. I bought several in case there was a problem. No problems connecting or using them. I recommend them.
Trustpilot
1 month ago
1 month ago
![Arduino Uno REV3 [A000066]](https://images-na.ssl-images-amazon.com/images/I/61AvdQOxFzL._AC_UL116_SR116,116_.jpg)
